Medicinal Gummies

Maca Cinnamon Gummies

During the last few months, when you came for your appointment, you have probably sampled some of my latest nutritive experiments – GUMMIES.  What was my path to making gummies you might be asking yourself? Well, it all started with learning about the benefits of beef gelatin as a recovery and strengthening food. Beef gelatin (collagen) heals gut lining, strengthens bones, protects tissues/muscles, decreases joint pain, improves blood sugar levels, sleep, hair, skin and nails. Those health benefits are just too compelling not to make something of it so when one of my clients gave me a silicon gummy mold after sharing about this rich protein source, I became a gummy maker and connoisseur. There are many other ways to incorporate beef gelatin into diets but gummies are a particularly unique, adorable and stealth way (especially for children) to micro dose nutrients that come in powder form.

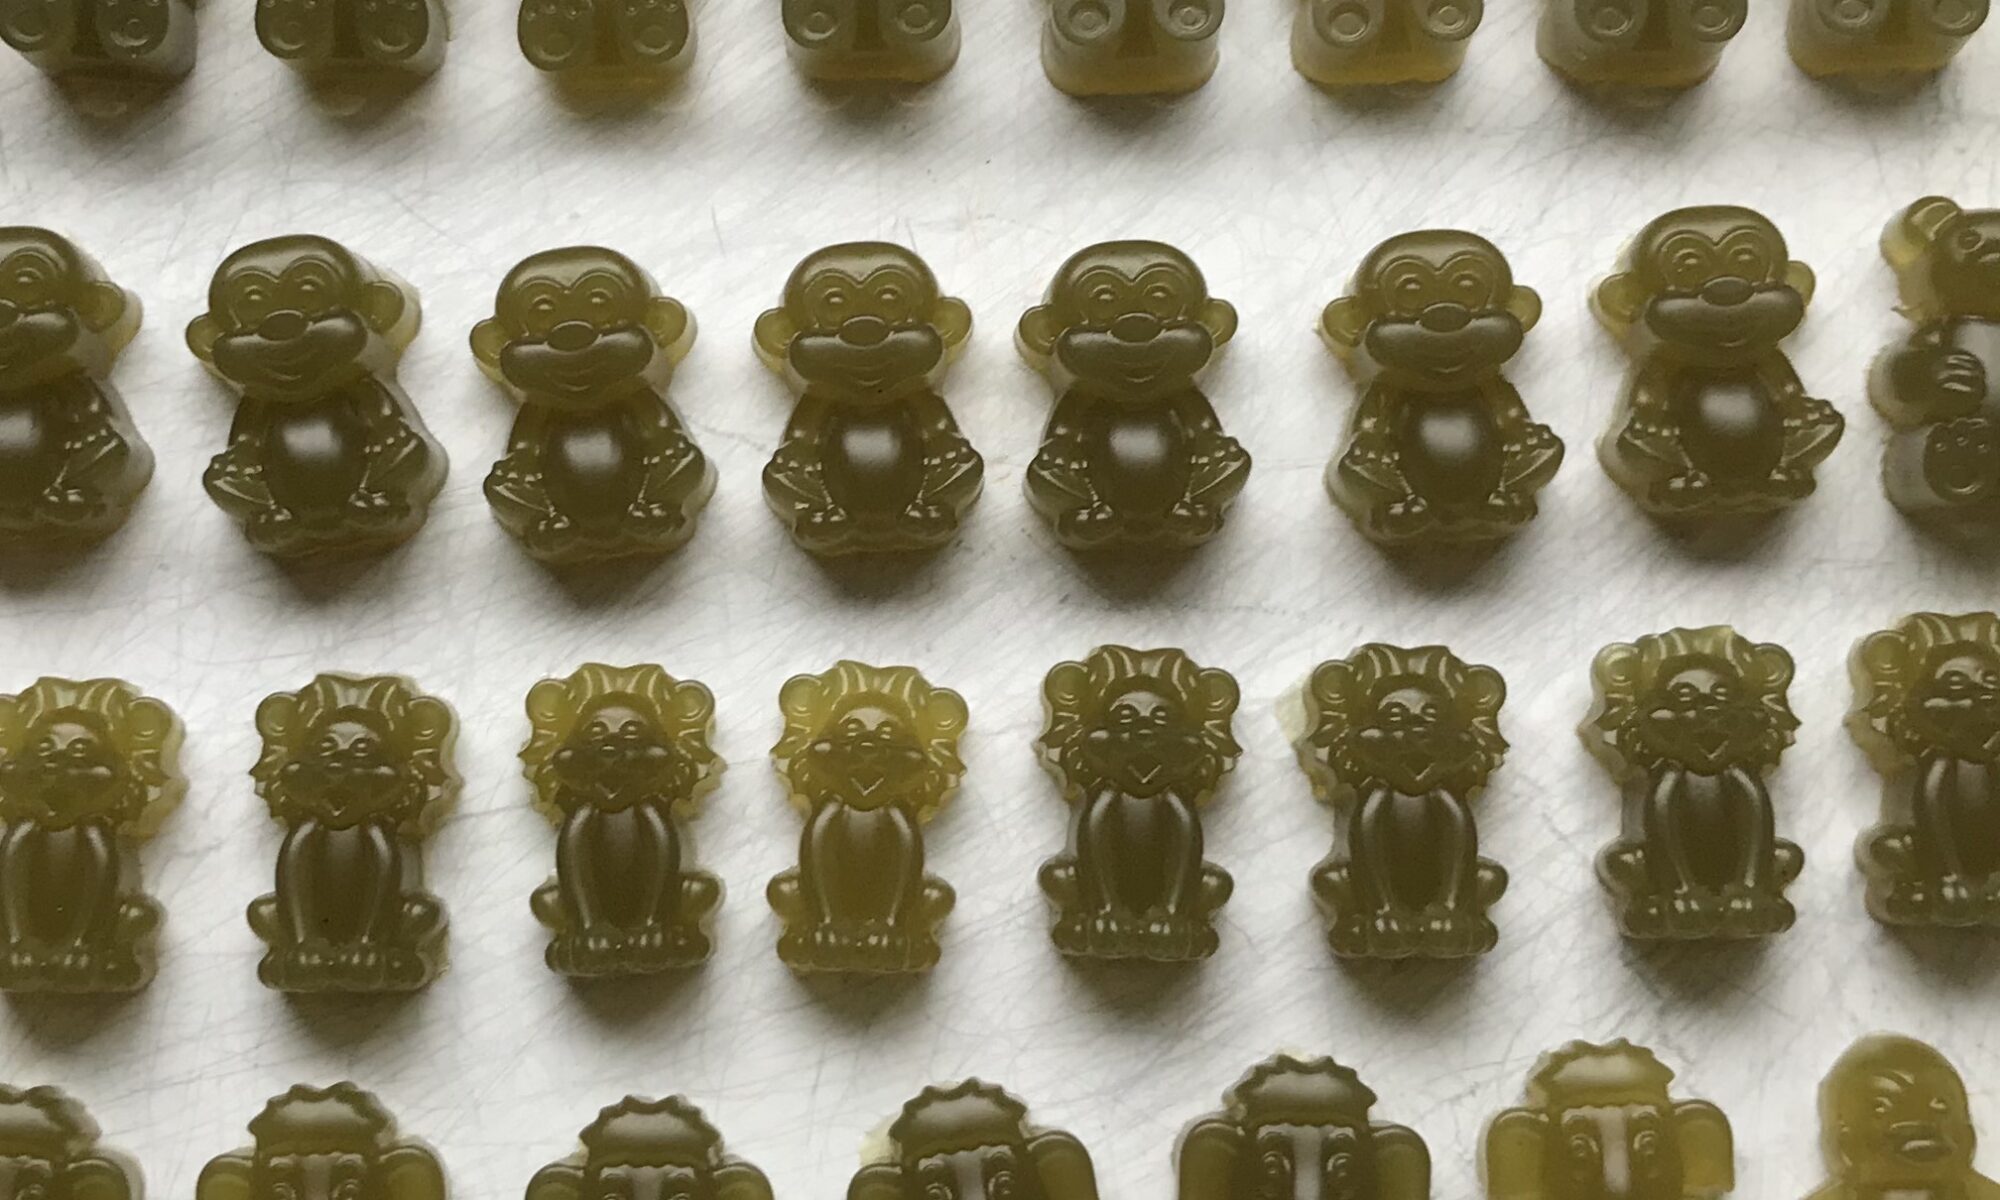
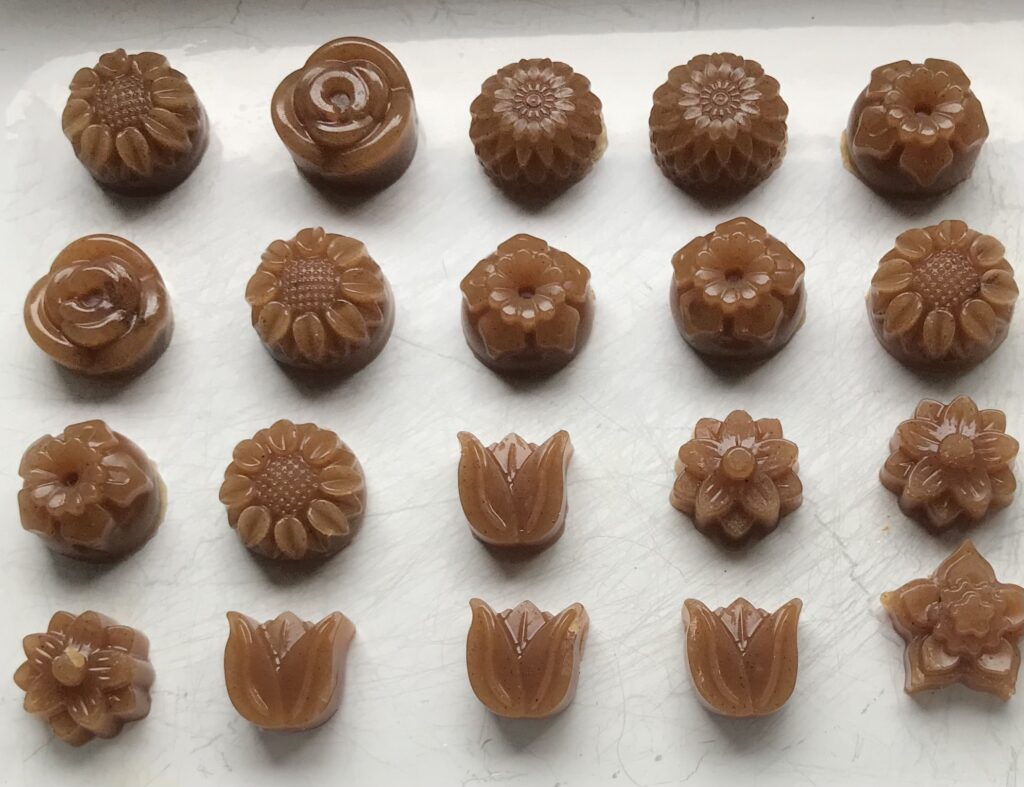
As a creative medium, the making of gummies is open for infinite experimentation and variation. Initially, I had some mushroom powders that I bought at Grocery Outlet and was eager incorporate them as a supplement in my diet. That led to other ideas and experiments. For the liquid portion in the recipe using fruit juices as your liquid gives a colorful presentation and medicinal teas can offer complex flavors. Mountain Rose Herb Company has an enticing selection of herb powders which might open your mind to the possibilities.  For example, after doing your research, you can make sleep gummies by adding valerian root powder or digestive gummies by adding aloe vera powder. Also consider converting your daily peppermint tea with added ingredients like greens superfoods into a gummy for a cheerful and stimulating mid-day snack or mini dessert! I don’t feel nearly as giddy when I take my multi-vitamin pill as I do when I pop a gummy in my mouth. There is a large selection of silicon gummy molds that you can find online. I am waiting for more iconic or groovy silicon molds to hit the market but for now I am settling for hearts, cute animals and patterned flowers.

Here is the basic recipe but experiment according to your tastes and ingredients.

1 cup liquid (juice, tea, water, milk – plant based or dairy)

2 tablespoons of sweetener (honey, maple syrup, agave)

4 tablespoons of Beef Gelatin (I use Vital Proteins)

1 tablespoon of supplement powders- medicinal mushroom (reishi, shitake, maitake), maca root, ashwagandha , greens superfoods, seaweeds, turmeric, beet root, hibiscus, magnesium, Vitamin C, etc 

½ – 1 teaspoon spices or flavors – ginger, cinnamon, lemon, lime, cacao, etc.

Here are some of my gummy recipes.

Pomegranate Reishi Ginger Gummy

1 cup Pomegranate juice

2 tablespoons honey

4 tablespoons beef gelatin

1 tablespoon Reishi Mushroom powder

½ teaspoon ginger powder

Maca Cinnamon Gummy

1 cup water

2 tablespoons maple syrup

4 tablespoons beef gelatin

1 tablespoon Maca powder

1 teaspoon cinnamon

Matcha Green Tea Lime Gummy

1 cup water

2 tablespoons honey

4 tablespoons beef gelatin

1 tablespoon Matcha green tea

1 teaspoon lime

Instructions

  1. In saucepan, combine liquid and sweetener and heat over medium heat until steaming hot but not quite boiling.
  2. Lower the heat to the lowest setting and stir in powders, spices or flavors.
  3. Whisk in gelatin one tablespoon at a time until fully dissolved.
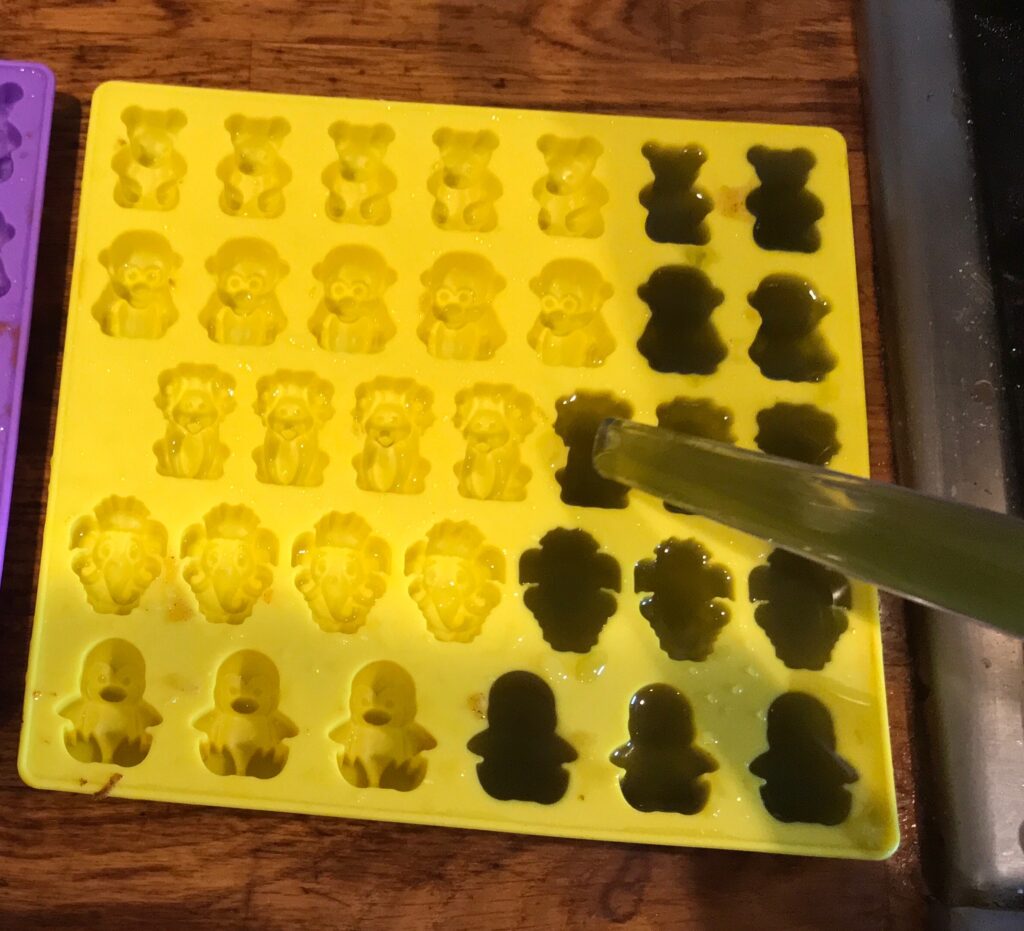
  4. Remove from heat and use a dropper to fill gummy molds. A larger dropper makes filling molds quick and easy.
  5. Put molds in refrigerator to firm up – 15 minutes to ½ hour.
  6. When firm, pop gummies out of mold and store in sealed container in refrigerator.
Filling silicon mold

Nut Parmesan

This recipe for nut parmesan is from Fire and Earth Kitchen in Seattle. I like quick food processor blend em’ up and store recipes that I can pull out as toppings for cooked veggies, salads, eggs, grains and pasta. I like this recipe because it is plant based and mighty tasty. Fatty nuts like brazil nuts and walnuts, in addition to seeds, offer their nutritional benefits and a nice depth of flavor. The nutritional yeast gives that cheesy taste not to mention B vitamins. I double the recipe so I have a surplus for generous sprinkling of nut parmesan thus extra nutrition on many of my dishes. This recipe is amenable to substituting other nuts and seeds like cashews or hemp seeds or spices like onion and chipotle powder.

Nut Parmesan Recipe

¼ cup raw brazil nuts

¼ cup raw sesame seeds (white or black)

¼ cup raw walnuts

½ cup raw hulled pumpkin seeds

½ tsp salt

¼ tsp garlic powder

1-2 Tbsp nutritional yeast. (I use 2 Tbsp)

Blend all ingredients in a food processer until it resembles parmesan cheese. Refrigerate. 

Lemongrass Tea

Growing lemongrass this past summer was one of my most successful experiments for both its medicinal benefits and culinary uses. I always enjoy the growing part of starting a plant by seed and watching its gradual development throughout the season but in October when a frost is imminent, I find myself hustling to figure out how to preserve my harvest and put it to work in my daily life. Even though lemongrass seems so exotic, it was easy to grow from seed, it was pest free and its long arching blades gave a full tropical look to the garden so I recommend growing and using its leaves in tea and roots in Thai soup.

When the season shifts to colder temperatures, I often find myself not drinking enough water in that transition. The symptoms of dehydration can show up as fatigue, dizziness or lightheadedness, dry eyes and mouth, wrinkly skin and reduced urination. This Fall, lemongrass is coming to my rescue with its subtle refreshing lemony taste. I refer to it as the universal taste donor because it blends beautifully with other herbs and roots. I especially like adding ginger, fennel seeds and honey to my tea and drinking it in a bowl so my nose has full access to all the aromas. 

As a compulsive maker, I spent many hours making little wreaths from the leaves which felt very satisfying. While the health benefits of lemongrass are numerous from both a Western and Eastern perspective, the aesthetics of having a wreath of lemongrass, a sprig of fennel and a chunk of ginger floating in a handmade tea bowl makes this cleansing calming cold chasing brew a keeper.

To make tea simply boil water and put a wreath or 1 tsp of dried lemongrass herb in a tea ball and let it steep. Add other herbs and honey, if desired. You can use the wreath multiple times.

You can buy dried lemongrass here.

Black Sesame Balls

Okay, I admit it, I’m a nutrient hoarder, and these black sesame balls makes good on that obsession. In this recipe, there are just a few ingredients which you mix in a Cuisinart- black sesame seeds, walnuts, goji berries, cinnamon, ginger, cardamon, salt and a little bit of honey so it is a quick and unfussy snack to make. The flavor is nutty with bursts of sour sweetness and the spices gives an undercurrent of a far away land mystery.  And it’s not too sweet so one does not start craving and thus eating too too many.

In East Asian Medicine,  black sesame seeds nourish the blood so if you are vegan or eat primarily a plant based diet or are just looking for a satisfying snack then black sesame seeds can be used as a general tonic. They also lubricate the intestines so are helpful if one has constipation. The other unusual ingredient in this recipe is goji berries which also has a tonic effect on Qi and blood and is full of antioxidants. The spices are all warming and support digestion as well.

Goji berries are a cousin of tomatoes so if you have a sensitivity to that family or if you don’t have access to goji berries, you can substitute other dried unsweetened berries. For example, Trader Joe’s sells freeze dried raspberries which could be substituted. Feel free to experiment with other spices also. Enjoy!

Bok Choy, Radish & Celery Ferment

A perfect and pretty side dish

Chop. Chop. Time to harvest and preserve the bok choy and radishes coming out of the garden. In this ferment, I use just the stems of bok choy and add celery to keep it crunchy. The red radishes offers a bit of spice and a pretty rosy hue.  Below is my recipe, such as it is. The fermentation process lends itself to experimentation and variation.  I change proportions of ingredients based on what is available from my garden or fresh in the grocery store, usually making quart size containers at a time.  Having a few different ferments bubbling away on the kitchen counter or in the refrigerator allows me to serve several small side dishes (Korean-style) alongside main dishes at dinner.  I also use this ferment in salads, veggie roll-ups or as a garnish on crackers with cheese or spreads too. The variation at the table not only stimulates interest but digestion as well.

In Vegetable Fermentation Further Simplified, Sandor Katz gives the lowdown on how to ferment any vegetable. Trust me – fermentation seems exotic but it is really super easy. If you are looking to get into fermentation, follow his guidelines and you’ll be making very original side dishes and manufacturing your own tasty probiotics in your kitchen in no time.  I’d love to hear about what you are fermenting.

Fermented Bok Choy, Radish & Celery

A few bunches of bok choy (only use white stems)

1 bunch red radishes (thinly sliced)

3 – 5 stocks celery

2-3 tablespoons of salt (amount of salt depends on volume of veggies and taste). Experiment!

(You can add garlic or any spice you please to this ferment as well)

Place chopped bok choy stems, celery and thinly sliced radishes in a flat dish and sprinkle salt over veggies. Let sit for a few hours until fluid is released from veggies. After washing hands, you can also massage veggies to release more fluid if necessary.

This time I used a Japanese pickle press to submerge my veggies but if you don’t have this handy kitchen tool, you can pack vegetables into a wide mouth canning jar or crock. Ideally, veggies are totally covered in salt brine but if not then add water. If you are using a crock, submerge veggies with a weight on top of a plate. If you are using a canning jar, you can use a double plastic baggie filled with water to submerge veggies. 

Use a rubber band to secure cheesecloth or fabric over jar or crock to keep flies out and let sit on counter for 4 -7 days. The speed of ferment will depend on amount of salt and outside temperature. The longer you let it ferment, the tangier the taste will be. I generally let this ferment sit for 4-5 days. Taste your ferment frequently.

Place in refrigerator when you like the taste.

Daikon Radish on the Daily

In our household we aren’t stockpiling toilet paper, we are stockpiling daikon radish during this pandemic. Using this stout root daily in raw salads, soups or main meals is one of our hedges for maintaining clear lung function.

In Traditional East Asian Medicine, daikon radish is considered to have a cooling thermal nature, and a pungent and sweet flavor. It cools heat, cuts mucous (dampness) and promotes digestion. It also acts as a detoxifier because, as a diuretic, it stimulates urination, helping to remove excess fluid from the body via the kidneys. These are ALL excellent indications for incorporating daikon radish into one’s diet, since the symptoms of Covid-19 are a fever, dry cough and accumulation of fluid in the lung.  

Compounding the coronavirus outbreak, we are in the midst of a seasonal change which is a typical time for common cold, flu, and allergy symptoms. As a preventative measure, use daikon radish to support your respiratory system and keep it congestion-free (regardless of the origin).  Of course, cutting down and/or eliminating phlegm producing foods like sugar, dairy, and alcohol will reduce inflammatory responses in your body.

One of the virtues of daikon radish is its versatility. It can be pickled, fermented, dehydrated, cooked or eaten raw. I hope this blog post doesn’t create a run on daikon radish, but currently Asian markets are well stocked.

Here are a few of my favorite recipes featuring daikon radish with simple and accessible ingredients. 

A white radish and ginger soup is the soup of our times. With our current damp weather, this clear and aromatic broth is soothing and tastes just right. It has just a few ingredients and requires merely minutes to make. The ginger brings warmth, helps improve digestion, and stimulates your metabolism, while the radish does its cleansing work. Just add any green on top. I especially enjoy adding nutrient rich chickweed or overwintered chives from the garden. Depending on how many individuals you are serving, adjust amounts and increase ginger if you want more heat.

White radish and ginger soup (serving 2)

3 cups water

handful of thinly sliced daikon radish

4 – 6 thin slices of ginger

I tsp chicken or vegetarian bouillon ( I use Better Than Bouillon)

Small bunch of coriander, chickweed, spinach, scallions or chives

Combine all ingredients and bring to the boil. Simmer for 10 minutes or so. Add the greens just before serving, along with salt and pepper to taste.

Okonomiyaki – Japanese Vegetable Pancake 

This recipe has become a comfort food for us in the last few weeks. In addition to daikon radish, cabbage is the major ingredient in this recipe. Cabbage also clears heat and increases circulation. You can substitute other shreddable vegetables or sprouts. For example, instead of carrots, I used sprouted mung beans in this recipe. If you don’t have miso, mayonnaise mixed with horseradish works just fine as a topping.

https://www.pbs.org/food/kitchen-vignettes/walter-riesens-okonomiyaki-japanese-vegetable-pancake/

Raw Daikon Salad

Since daikon radish is considered a cooling food, it is best to serve this salad on a warm day or as a side dish for a spicy meal or a heavy dish. I often add horseradish in my vinaigrettes for its taste and its instant sinus clearing action!

https://www.japancentre.com/en/recipes/1313-daikon-salad

Daikon Chips

Fortunately, daikon radish stores well in the refrigerator but if you stockpile daikon radish then you have the mandate to use them or preserve them. I riffed off this recipe to make dehydrated Daikon Chips. I used olive oil instead of canola oil and experimented with different seasonings like nutritional yeast, chili pepper, onion and garlic salt and just simply salt and pepper. If you don’t have a dehydrator, you can use your oven if you can set it to 125 degrees. These chewy slightly spicy chips are a nutritious low calorie and tasty snack to have on hand.

Fire Cider

20141216_104347_2

When my BFF dropped off six perfect little empty bottles, I was inspired to utilize them as carriers for this season’s remedy gift for friends, neighbors and clients.  Since I had always wanted to try Fire Cider and had a month to go before the end of the year, I decided to make my first batch. I can now report from my own and recipients’ reviews – this is good stuff.

Whether you take a swig straight from the bottle or put a teaspoon in hot water or cocktails, or add it to salad dressing, you will instantly register the delicious potency of this fine folk remedy.  It’s a perfect daily tonic for cold/flu season as it warms your insides up like an immune whisky.  It has all the requisite flavors (spicy, pungent, bitter, sour and sweet) for kicking pathogens like cold and dampness out of your body and stimulating blood circulation.

I followed the recipe below from Mountain Rose Blog and also added astragulus root.  I did keep my batch in a dark cabinet, but, full disclosure, I did not shake it every day. I only shook it once. This kind of recipe is infinitely adjustable to tastes and variations based on whatever you have in your pantry.  The apple cider acts as a perservative so it does not have to be refrigerated.  After I strained out my first batch, I added more cider vinegar over my shredded roots and herbs so I could extract even more of their medicinal properties.

With a dose of Fire Cider every day, I feel well armed this winter for keeping colds at bay.

Ingredients
1/2 cup fresh grated organic ginger root

1/2 cup fresh grated organic horseradish root

1 medium organic onion, chopped

10 cloves of organic garlic, crushed or chopped

2 organic jalapeno peppers, chopped

Zest and juice from 1 organic lemon

Several sprigs of fresh organic rosemary or 2 tbsp of dried rosemary leaves

1 tbsp organic turmeric powder

1/4 tsp organic cayenne powder

organic apple cider vinegar

raw local honey to taste

Directions
Prepare all of your roots, fruits, and herbs and place them in a quart sized jar. If you’ve never grated fresh horseradish, be prepared for a powerful sinus opening experience! Use a piece of natural parchment paper under the lid to keep the vinegar from touching the metal, or a plastic lid if you have one. Shake well! Store in a dark, cool place for one month and remember to shake daily.

After one month, use cheesecloth to strain out the pulp, pouring the vinegar into a clean jar. Be sure to squeeze as much of the liquid goodness as you can from the pulp while straining. Next, comes the honey! Add 1/4 cup of honey and stir until incorporated. Taste your cider and add another 1/4 cup until you reach the desired sweetness.

Ingredient Variations
These herbs and spices would make a wonderful addition to your Fire Cider creations:

Thyme
Rosehips
Star Anise
Schisandra Berries
Astragalus
Parsley
Burdock
Oregano
Peppercorns
Beet Root Powder
Habanero Powder
Bird’s Eye Chili Powder
Whole Chili Peppers
Fresh orange, grapefruit, lime juice and peels

Non-gluten Bread

IMG_1407The fall season is upon us, and naturally I crave heavier richer foods. Especially carbohydrates. Toast with butter, to be specific. But, here’s the thing – I try to limit carbohydrates, especially breads. How I satisfy my craving for bread is by making non-gluten bread recipes, even though I am not gluten intolerant. Because they are flourless and made of fermented grains, non-gluten breads offer more nutrients per calorie. If I’m going to eat bread, it has to satisfy my cravings and be worth its heft for my slower winter.

Here are two non-gluten bread recipes I found that are simple, flavorful, and most importantly, unfussy. They are infinitely amenable to variations. I always add hemp seed and more salt, especially on the top of the loaf.

This buckwheat bread is really simple, hearty and inexpensive: https://breadtopia.com/gluten-free-fermented-buckwheat-bread/

This quinoa/millet bread, although more complex, has a sweet nutty flavor and when it is toasted the edges crisp up just right: https://www.wholeheartedeats.com/the-unbelievable-bread_20-html/

Borgenola Raw Breakfast Recipe

IMG_0842 Borgenola, that’s the name of my new favorite raw breakfast.  It’s named after my trusted advisor, Danny Borgen, because it was his brainchild, but like all inventions with a good original formula, it evolved.

Originally, Danny turned me on to his after workout snack/lunch, which was a combination of flax and pumpkin seeds.  As his nutritional trusted advisor, I subsequently recommended chia seeds to replace the flax and later hemp hearts. He, continuously fascinated by the science of food, added raw cacao nibs.

Finally, after all this talk about his combo, I tried it, liking it enough to incorporate it as a breakfast food myself.  To his Borgenola, I added raw sunflower seeds.  The gelatinous chia mixed with crunchy sunflower, pumpkin and cacao nibs offers tasty granola-like textures.  Because of the high amount of protein in chia and hemp, it satisfies, not to mention stabilizes blood sugar levels, but it is light, unlike oatmeal or other grain based morning cereals. Both chia and hemp seeds are also high in essential fatty acids, which give them anti-inflammatory properties. Hemp contains all the amino acids which build protein and aide in developing lean body mass and muscular repair, making it an ideal after workout food.  As for the other seeds, sunflower most notably offers vitamin E, selenium and folate while pumpkin offers magnesium, zinc and manganese.  Cacao nibs, besides its desirable chocolate taste, also offers a significant yield of  magnesium, manganese and copper. All with more nutritional merit than mentioned in this post, these superfood seeds united feel so right mixed together.  Check out the nutritional data for yourself.

Depending on the season, it can be eaten as a warm or cold meal. You can add fruit, jam or sweeteners, or not; chia, neutral in taste, harmonizes well with very little or no sweetener. It’s a clean, simple, high nutrient, non-allergenic, non-inflammatory, raw breakfast or snack that lends itself to infinite permutations.  Try it.

IMG_0806

Borgenola Raw Breakfast Recipe

3 Tablespoons chia seed

1 cup water (hot or cold)

3 Tablespoons Hemp Hearts

1 Tablespoon raw pumpkins seeds

1 Tablespoon raw sunflower seeds

1 teaspoon raw cacao nibs

Optional

1 Tablespoon shredded coconut

Berries, pear or apple slices

1 tsp. maple syrup, agave or honey or fruit jam

Instructions:

Add 1 cup heated or cold water to chia seeds and stir.  Wait 15 minutes until gelatinous.  Stir again and add remaining ingredients.


Homemade Energy Bars

IMG_0580Months before our epic John Muir Trail hike last summer, I experimented with making homemade energy bars; the goal being to bring along tasty nutrient rich snacks that could fuel us on our calorie burning days. I scoured all the energy bar recipes on the web and closely inspected the ingredients lists on the huge array of protein/power/nutrition/ raw bars sold at my local food coop. I was most interested in what manufacturers were using as binders to hold bars together.  After my research and experiments, I found what worked best for me was using a combination of dried dates or apricots, chia seeds, honey, nut butters, apple sauce and coconut oil.  Because I favor raw foods, I used a dehydrator instead of an oven to retain the most nutrition, and preserve the energy bars.  Be assured that the chewy texture was not compromised from being dehydrated.

As we prepared for our hike, I brought along samples of my energy bars for my hiking partners to try out on our training hikes which helped me refine my recipes. Although I wasn’t scientific about calculating their carbohydrate, protein and fat ratios, they were definitely satisfying.  I can attest that once we were on the John Muir Trail, these energy bars did fuel me up all the mountain passes and kept me going on long mileage days. They traveled well in high heat, held their shape and performed admirably on a caloric level, so much so that we ate far fewer of them than anticipated.  Whether you are hiking or not, it’s handy to have these bars around as snacks or additions to lunches.

The following recipes, although all yummy, are listed in order of popularity. Use my recipes as a guideline for proportions but make substitutions for different protein powders, nuts, seeds or dried fruit if you have a different preference.  Store them in glass sealed containers or, if traveling, you can vaccuum pack or keep them in Ziploc plastic bags.

Sprouted Buckwheat & Carob Energy Bar

The sprouted buckwheat offers a nice crunchy texture and Carob satisfies chocolate lovers.

1 cup dried dates (soaked)

1 cup almond meal

1 cup whey protein powder

1 cup walnuts

2 cups sprouted buckwheat groats

½ cup Chia seeds  (soak ½ cup chia seeds in 1 cup water)

¼ cup carob powder

½ cup cacao nibs

¼-1/2 cup honey

pinch salt

Instructions

Sprout  your buckwheat groats.  I place my grouts in a colander to sprout so it is easy to rinse.

Soak ½ cup chia seeds in 1 cup water.  Wait ½ hr.

In Cuisine art, pulse walnuts into small chunks.  Put aside

In Cuisine art, pulse soaked dates into a paste.

In mixing bowl, mix together all of the above ingredients until they all stick together. Transfer and flatten mixture to ½”-5/8” on dehydrator trays covered with either parchment or non-stick dehydrator sheets on them.  Use a pizza cutter to cut energy bars into a grid of whatever dimensions you prefer, but don’t cut all the way through so you can easily flip it later.  Set temperature on dehydrator to 115 degrees and dry for 12 hours.  After 12 hours, flip the whole mass onto the trays and peel away the non-stick dehydrator sheets so bars will dehydrate completely.  Dry for another 12 hours or longer until energy bars have no more moisture.  Use a knife to slice energy bars into separate pieces. Store.


Sesame & Cashew Chew Energy Bar

I cup Cashews

1 cup Sesame seeds

I cup dates (soaked)

½ cup coconut flakes

¼ cup honey

1 inch grated ginger

pinch of salt.

In Cuisine art, blend cashews into a meal (put aside)

In Cuisine art, pulse soaked dates into paste

After making date paste, add cashew meal and then all the rest of the ingredients in Cuisine art.  Blend into a sticky mixture.  Dehydrate at 115 degrees. Follow same instructions on dehydrating in above recipe.


Apricot Oat Energy Bar

1 cup dried apricots (soaked)

½ cup applesauce

1 cup quick oats

1 cup almond butter

½ cup honey

½ cup coconut flakes

1 tsp vanilla

pinch of salt.

In Cuisine art, pulse soaked apricots into paste.  Add all the rest of the ingredients in Cuisine art and blend into sticky mixture.  Dehydrate at 115 degrees. Follow same instructions on dehydrating in above recipe.